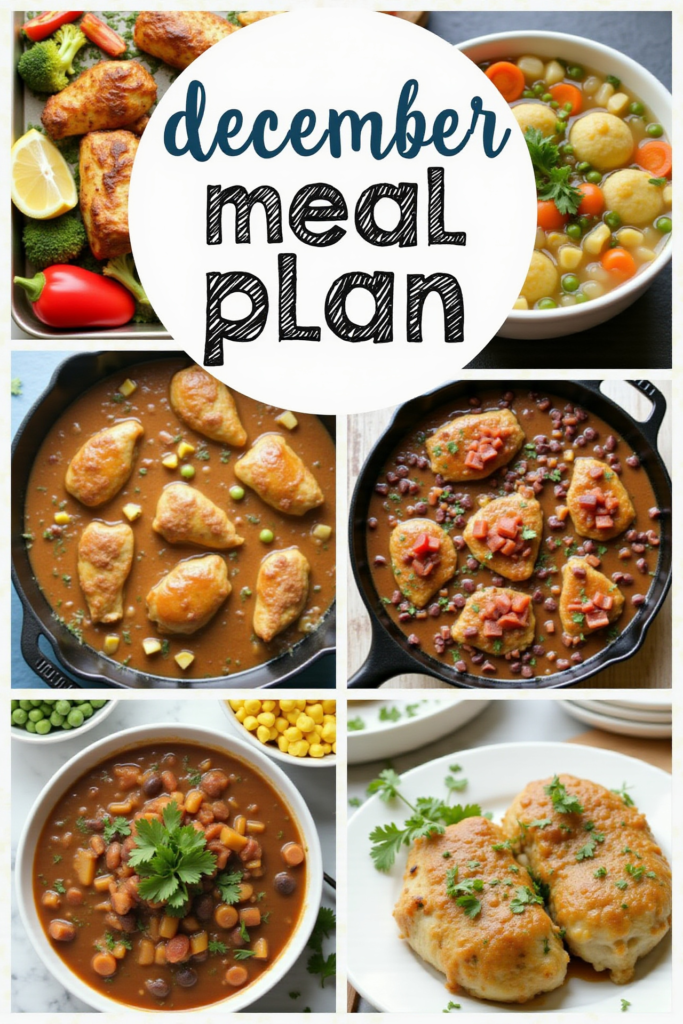
December Meal Plan

Introduction

A well-crafted December Meal Plan is the secret to enjoying a festive, stress-free holiday season. With family gatherings, celebrations, and hectic schedules, meal planning ensures you have delicious and balanced meals on the table—without the last-minute scramble. This guide helps you curate warming comfort foods, crowd-pleasing treats, and nutritious everyday meals through the month.

Why Plan Your December Meals?

December is bursting with opportunities for both celebration and connection. From cozy weeknight dinners to show-stopping holiday feasts, thoughtfully planning your meals lets you focus on enjoying the moment. Meal plans help you avoid repetitive dinners, reduce grocery waste, and save precious time—making the holidays extra merry.

The Ultimate December Meal Plan: Classic Comfort & Festive Favorites

Our December meal plan highlights a harmony of flavors and seasonal ingredients. Picture a week featuring:

– Hearty beef stew with root vegetables
– Roasted chicken with cranberry glaze
– Creamy mushroom risotto
– Gingerbread pancakes for cozy brunches
– Butternut squash soup
– Festive peppermint brownies
– Classic sugar cookies

Each recipe balances flavor, nutrition, and approachable preparation—making your December deliciously easy.

December Meal Plan Sample Recipes & Shopping List

A successful meal plan starts with an organized shopping list. Here’s a sample snapshot:

Ingredients

Proteins:
– Chicken breasts or thighs
– Stew beef
Produce:
– Carrots, potatoes, parsnips, butternut squash
– Fresh spinach, onions, mushrooms
– Garlic, leeks, fresh herbs
Pantry:
– Arborio rice
– Chicken or beef broth
– All-purpose flour
– Granulated and brown sugar
– Baking powder, baking soda
Dairy & Eggs:
– Heavy cream
– Eggs
– Butter
Holiday Touches:
– Cranberry sauce
– Peppermint extract
– Festive sprinkles for cookies

💡Meal Planning Tip: Save this meal plan to automatically generate a master shopping list sorted by store section. This ensures you get in and out of the store quickly and never forget a key ingredient for your December meals.

CookifyAI meal planning interface

Instructions

  1. Select Recipes: Review the list above and choose your family’s favorites, or pick from classic December dishes like roast turkey, casseroles, and hearty soups.
  2. Organize by Week: Assign each dish to specific dates, taking into account busy nights and special events.
  3. Prep Ingredients: Use your consolidated shopping list to ensure you have everything you need, batch prepping vegetables or proteins for several meals at once.
  4. Make-Ahead Magic: Consider doubling recipes and freezing portions in advance to save even more time during the busiest weeks.
  5. Bake in Batches: Holiday desserts like cookies and brownies can be baked in bulk and stored for gifting or last-minute guests.

Weekly Meal Planning

Making meal plans work for your busy December is easy with digital tools. Save and schedule this meal plan to proactively arrange your festive feasts and day-to-day dinners. CookifyAI automatically compiles your recipes, calculates total ingredients needed, and organizes your shopping list—all in one place.

Planning Benefits:

– Consolidates and sums up quantities across recipes so you never overbuy or run short
– Organizes your list by grocery store section for a speedy trip
– Supports make-ahead and batch cooking strategies, perfect for December’s busy pace
– Cuts down on food waste and forgotten ingredients

Pro tip: When planning your December meals, schedule your dishes in CookifyAI to spot ingredient overlaps and optimize your grocery list. For example, planning for both holiday cookies and Sunday breakfast pancakes? The planner tallies the eggs, flour, and butter so you know exactly how much to buy before your big shop.

Cook and Prep Times

Prep time per meal: 15–30 minutes
Cook time per meal: 20–60 minutes (depending on the recipe)
Weekly total cook time: 4–6 hours (with meal prep and batch cooking)

Summary

A December Meal Plan is your secret weapon for enjoying festive, flavorful meals with far less stress. With batch cooking, timely shopping lists, and scheduled recipes, you’ll enjoy more time with friends and family—and celebrate the season with confidence and ease.

Cozy Fall Delight: The Ultimate Easy Cinnamon Sugar Apple Cake Recipe

Easy Cinnamon Sugar Apple Cake: Cozy Fall Dessert

Introduction

Warm spices, tender apples, and a golden crackly sugar topping—this Easy Cinnamon Sugar Apple Cake embodies the irresistible flavors of fall, all in one incredibly simple dessert. With every slice, you’ll enjoy a perfect balance of juicy fruit and comforting spice. It’s a crowd-pleaser for gatherings, potlucks, or a family dinner that needs a comforting, homemade finish.

Why This Cinnamon Sugar Apple Cake Stands Out

This apple cake delivers autumn charm with minimal effort. The batter comes together effortlessly in just one bowl, sparing you a pile of dirty dishes. Its moist, tender crumb is achieved by folding juicy apple chunks right into the batter. A cinnamon sugar crust bakes up crisp and crackly for that delightful contrast in each bite. Whether served warm with whipped cream or enjoyed as a sweet breakfast treat, this cake always hits the spot.

Choosing and Prepping Your Apples

For the best flavor and texture, opt for sturdy, tart apples like Granny Smith or Honeycrisp. Dice them evenly so they’ll soften without breaking down. Tossing the apples in a little lemon juice prevents browning and brightens up their flavor, making the cake taste extra fresh.

Baking the Ultimate Cinnamon Sugar Apple Cake

Pour the thick batter into your prepared pan and generously sprinkle a mixture of cinnamon and sugar over the top. This ensures a beautifully caramelized, aromatic crust. Bake until a tester comes out clean and the top is golden and crisp. Let the cake cool slightly before slicing to allow the texture and flavors to settle.

Serving Ideas to Elevate This Cozy Fall Dessert

A warm slice is wonderful on its own, but for a special treat, add a scoop of vanilla ice cream or a dollop of whipped cream. Pair with hot apple cider or spiced tea for the ultimate autumn dessert experience. Leftovers stay moist for days, making them just as delicious for breakfast as for dessert.

Nutritional Information and Serving Size

One 8-inch cake yields about 8 servings. Each serving contains roughly 280-320 calories (depending on the sugar and apples used), making it an indulgent but approachable treat fit for any occasion.

Easy Cinnamon Sugar Apple Cake (Recap)

With minimal prep and classic autumn flavors, this cake is sure to become a seasonal go-to. Its crunchy cinnamon sugar top and juicy apple interior create a dessert that’s as nostalgic as it is irresistible.

Ingredients

1 1/4 cups all-purpose flour
3/4 cup granulated sugar (divided; 1/2 cup in batter, 1/4 cup for topping)
1/2 teaspoon baking powder
1/2 teaspoon baking soda
1/4 teaspoon salt
1 teaspoon ground cinnamon (divided; 1/2 teaspoon in batter, 1/2 teaspoon for topping)
1/2 cup unsalted butter, melted and cooled
2 large eggs
1/3 cup sour cream or plain yogurt
1 teaspoon vanilla extract
2 medium apples (about 2 cups peeled and diced)
1 teaspoon fresh lemon juice

💡Meal Planning Tip: Save this recipe to automatically generate an organized shopping list with all ingredients sorted by store section—perfect for efficient grocery trips and meal planning!

CookifyAI meal planning interface

Instructions

  1. Preheat your oven to 350°F. Grease and flour an 8-inch round or square baking pan.
  2. Peel, core, and dice the apples. Toss them with lemon juice and set aside.
  3. In a large bowl, whisk together flour, 1/2 cup sugar, baking powder, baking soda, salt, and 1/2 teaspoon cinnamon.
  4. Add melted butter, eggs, sour cream (or yogurt), and vanilla. Stir until just combined—do not overmix.
  5. Gently fold in the diced apples.
  6. Spread the batter evenly into the prepared pan.
  7. In a small bowl, combine the remaining 1/4 cup sugar with remaining 1/2 teaspoon cinnamon. Sprinkle this mixture evenly over the top of the batter.
  8. Bake for 35-40 minutes, or until the cake is golden and a tester inserted in the center comes out clean.
  9. Cool in the pan for 15 minutes before slicing and serving.

Weekly Meal Planning

This Easy Cinnamon Sugar Apple Cake fits seamlessly into your weekly meal prep. Save and schedule this recipe to plan when you’ll bake it, and let CookifyAI automatically generate a shopping list that combines ingredients from all your planned meals.

Planning Benefits:

  • Automatically aggregates each ingredient’s total quantity needed for the week
  • Sorts your shopping list by grocery store sections for quick, organized trips
  • Eliminates accidental duplicate buys or missed essentials
  • Keeps your weekly kitchen prep stress-free, efficient, and enjoyable

Pro tip: When planning other fall recipes with apples or baking staples, schedule your recipes in CookifyAI to automatically sum up overlapping ingredient quantities—helping you minimize waste and maximize convenience.

Cook and Prep Times

Prep Time: 20 minutes
Cook Time: 40 minutes
Total Time: 1 hour

Budget-Friendly Casseroles: Comforting Meals That Won’t Break the Bank

Budget-Friendly Casserole Recipes

Introduction

Casseroles are the unsung heroes of home cooking, delivering big, comforting flavors with minimal fuss and maximum versatility. Their all-in-one nature makes them ideal for feeding a hungry crowd, prepping in advance, and—perhaps best of all—sticking to a budget without skimping on taste. Whether you’re feeding a family, prepping work lunches, or simply looking for an easy weeknight meal, these budget-friendly casserole recipes prove that you don’t need to spend much to eat well.

Why You’ll Love These Budget-Friendly Casseroles

Casseroles shine when it comes to simplifying mealtime. They cut down on dirty dishes, often rely on affordable pantry staples, and transform leftovers into something new and exciting. You’ll be amazed at how a few basic ingredients—rice, beans, pasta, cheese, and a protein—come together to make something deeply satisfying, customizable, and crowd-pleasing every time.

Standout Recipe: Cheesy Chicken & Rice Casserole

This Cheesy Chicken & Rice Casserole epitomizes the budget-friendly casserole—basic, accessible ingredients unite for a hearty, flavorful dish. With tender chicken, perfectly cooked rice, bright veggies, and gooey cheese, all baked together in one dish, your family will ask for this meal again and again.

Ingredient Spotlight for Cheesy Chicken & Rice Casserole

Classic casseroles are flexible, letting you swap proteins and vegetables according to what you have on hand or what’s on sale. This particular recipe relies on rotisserie or leftover chicken, making it cost-effective and time-saving, and frozen mixed vegetables, bringing nutrition and convenience to the table.

Ingredients

2 cups cooked white rice
2 cups cooked chicken (rotisserie or leftovers), chopped
1 cup frozen mixed vegetables
1 can (10.5 oz) condensed cream of chicken soup
1 cup shredded cheddar cheese, divided
1/2 cup milk
1/2 teaspoon garlic powder
1/2 teaspoon onion powder
Salt and pepper, to taste
1/2 cup crushed buttery crackers or breadcrumbs (optional, for topping)
Cooking spray

💡Meal Planning Tip: Save this recipe to CookifyAI to instantly generate a categorized shopping list with all the ingredients you need, making grocery trips faster and meal planning more efficient.

CookifyAI meal planning interface

Instructions

  1. Preheat your oven to 375°F. Lightly coat a 9×13-inch casserole dish with cooking spray.
  2. In a large mixing bowl, combine cooked rice, cooked chicken, frozen vegetables, cream of chicken soup, milk, 3/4 cup of shredded cheese, garlic powder, onion powder, salt, and pepper. Mix until everything is evenly incorporated.
  3. Spread the mixture evenly in the prepared casserole dish. Sprinkle the remaining cheese (and optional cracker or breadcrumb topping) over the top.
  4. Bake for 25-30 minutes, until the casserole is bubbling and the cheese is starting to brown. If using a cracker or breadcrumb topping, bake for an extra 5 minutes for a crispy finish.
  5. Let cool for a few minutes before serving. Enjoy!

Serving Suggestions for Budget-Friendly Casseroles

Pair this casserole with a simple green salad or steamed vegetables for a balanced, wholesome meal. Casseroles also reheat beautifully, so leftovers can be packed into lunches or enjoyed again for an easy second dinner.

Nutritional Information and Serving Size

This recipe makes approximately 6 servings. Each serving contains about 350-400 calories, depending on the toppings and cheese used—a nutritious, filling meal with a friendly price tag.

Why These Budget-Friendly Casserole Recipes Are a Must-Try (Recap)

Affordable, adaptable, and always satisfying, casseroles using pantry and leftover ingredients are your ticket to easy meal planning and less wasted food. Cook once, feed the family—and enjoy a stress-free cleanup!

Weekly Meal Planning

Budget-friendly casseroles are ideal for batch cooking and planning ahead—prep once, and you’ll have hearty meals all week long. Save and schedule this recipe with CookifyAI to coordinate your weekly dinners, consolidate your shopping list across all planned dishes, and prevent duplicate or forgotten ingredients.

Planning Benefits:

  • Easily scales ingredients if you want to double the recipe or plan for a larger group
  • Keeps ingredients organized by store section, from produce to pantry
  • Reduces food waste by showing you where ingredients overlap with other planned meals
  • Saves time and reduces stress—perfect for busy households looking to stay on budget

Pro tip: If you’re prepping multiple casseroles, plan your whole week to get one master shopping list that tells you exactly what quantities you’ll need for every ingredient.

Cook and Prep Times

Prep Time: 10 minutes
Cook Time: 30 minutes
Total Time: 40 minutes

With these budget-friendly casserole recipes in your rotation, home-cooked meals stay affordable, delicious, and stress free—no matter how busy (or budget-conscious) you are!

Cheesy Chicken Broccoli Casserole: Your Go-To Cozy Weeknight Delight

Cheesy Chicken Broccoli Casserole – Easy & Comforting Dinner

Introduction

Looking for a comforting, family-friendly dinner that comes together in no time? This Cheesy Chicken Broccoli Casserole is loaded with tender chicken, crisp broccoli, and gooey cheese, all baked to bubbling perfection. Balanced, satisfying, and a true crowd-pleaser, it’s your answer to busy weeknights when you crave something both hearty and simple.

Why You’ll Love This Cheesy Chicken Broccoli Casserole

This casserole delivers big flavor with minimal effort. Each bite features juicy chicken, bright broccoli, and a creamy cheese sauce that ties everything together. Not only is it easy to prepare in advance, but it’s also a one-dish meal that requires little cleanup and is sure to win over both kids and adults at the table.

Choosing the Right Chicken and Cheese

Use cooked shredded or diced chicken breast or thighs for best texture—rotisserie chicken works perfectly. For the cheese, sharp cheddar adds classic flavor, while a hint of mozzarella brings extra meltiness. Want extra zest? Try mixing in a bit of Parmesan or Monterey Jack for an unexpected twist.

Preparing the Broccoli for Maximum Flavor

For vibrant color and texture, use fresh broccoli florets. Blanch them briefly in boiling water or microwave for 2–3 minutes until just tender but still green before mixing into the casserole. If using frozen broccoli, thaw and drain well to prevent excess moisture in your dish.

How to Assemble Your Casserole

Layer the cooked chicken and blanched broccoli in your baking dish, then pour over a smooth cheese sauce made from cream of chicken soup, sour cream, and shredded cheese. Sprinkle extra cheese and buttery breadcrumbs on top for a golden, crisp finish after baking.

Serving Suggestions for a Comforting Dinner

Pair this casserole with a simple green salad or serve over a bed of brown rice or buttered egg noodles for a complete meal. For added crunch, top with sliced almonds or toasted panko breadcrumbs just before serving. It’s a cozy main dish that shines on weeknights or as a potluck favorite.

Nutritional Information and Serving Size

This recipe makes 6 generous servings. Depending on cheese and sauce choices, each serving is approximately 400–480 calories. Rich in protein and veggies, it delivers both comfort and nutrition.

Cheesy Chicken Broccoli Casserole (Recap)

Whether you’re prepping ahead or craving homemade comfort food, this casserole’s simple prep, hearty ingredients, and cheesy finish put it at the top of any dinner list. It’s sure to become a family favorite for years to come.

Ingredients

3 cups cooked chicken, shredded or diced
4 cups broccoli florets (fresh or frozen)
1 can (10.5 ounces) cream of chicken soup
1 cup sour cream
2 cups shredded cheddar cheese, divided
½ cup mozzarella cheese, shredded (optional)
1 teaspoon garlic powder
½ teaspoon onion powder
Salt and black pepper to taste
1 cup crushed buttery crackers or panko breadcrumbs
2 tablespoons butter, melted
Optional: ¼ cup Parmesan cheese, grated

💡Meal Planning Tip: Save this recipe to instantly create a categorized shopping list with all ingredients organized for your next grocery run. It streamlines meal planning and ensures you’ll never miss an ingredient!

CookifyAI meal planning interface

Instructions

  1. Preheat oven to 375°F (190°C). Lightly grease a 9×13-inch baking dish.
  2. Prepare broccoli: If using fresh, microwave or blanch broccoli florets until just tender and vibrant green (about 2–3 minutes); drain and set aside.
  3. Mix sauce: In a large bowl, combine cream of chicken soup, sour cream, 1½ cups cheddar cheese, mozzarella (if using), garlic powder, onion powder, salt, and pepper.
  4. Assemble casserole: Spread chicken and broccoli evenly in the baking dish. Pour cheese sauce over the top and mix to coat evenly. Sprinkle with remaining cheddar and Parmesan (if using).
  5. Top and bake: In a small bowl, mix breadcrumbs or cracker crumbs with melted butter. Sprinkle over the casserole. Bake uncovered for 25–30 minutes, until bubbly and golden brown on top.
  6. Serve: Let cool slightly before serving. Enjoy warm!

Weekly Meal Planning

This casserole is ideal for meal prep—make ahead, refrigerate, and simply bake when ready. Save and schedule this recipe in your weekly meal planner to auto-generate a detailed shopping list and see all your meals in one place.

Planning Benefits:

– Combines all ingredients from planned recipes for accurate shopping
– Sorts your grocery list by category for faster store trips
– Cuts down on forgotten items and duplicate purchases
– Makes batch cooking and leftovers easy to manage

Pro tip: Schedule similar recipes for the week and CookifyAI will calculate total ingredient needs (like chicken or cheese) across all meals, making shopping seamless and cost-effective.

Cook and Prep Times

Prep Time: 15 minutes
Cook Time: 30 minutes
Total Time: 45 minutes

Enjoy casseroles made easy—and never forget an ingredient again with smart weekly planning!

Honey Garlic Sheet Pan Sausage & Veggie Bake: An Effortless Flavor-Packed One-Pan Wonder

Honey Garlic Sheet Pan Sausage and Sweet Potatoes with Broccoli

Introduction

Honey Garlic Sheet Pan Sausage and Sweet Potatoes with Broccoli is your answer to effortless weeknight dinners packed with flavor. The sweet, tangy glaze caramelizes beautifully over the veggies and sausage, while everything roasts to perfection on a single pan—meaning less cleanup and more time to relax. Perfect for busy families or meal preppers, this dish brings together nourishing ingredients with bold honey garlic flavor.

Why This Honey Garlic Sheet Pan Dinner is a Winner

There’s a reason sheet pan meals are so popular: convenience and robust flavor in every bite. Sweet potatoes absorb the sticky honey garlic glaze, while meaty sausages and roasted broccoli add heartiness and crunch. The combination satisfies both your sweet and savory cravings, making it a surefire crowd pleaser. It’s also endlessly customizable—just swap in your favorite sausage variety or veggies to suit your preferences.

Crafting the Perfect Honey Garlic Glaze

A classic blend of honey, fresh garlic, olive oil, and a splash of Dijon mustard creates an irresistible sauce that ties the whole dish together. Whisk these ingredients until smooth, then toss thoroughly with your sweet potato chunks, broccoli florets, and sliced sausage. The magic happens in the oven as the glaze thickens and caramelizes, coating every piece with layers of flavor.

Effortless Assembly and Roasting

To ensure even roasting, spread all ingredients in a single layer on your largest sheet pan. Begin by roasting the sweet potatoes for a short time before adding the sausage and broccoli, since sweet potatoes need a little longer to cook through. Drizzle with any remaining glaze before the final bake for extra flavor.

Serving Suggestions for a Complete Meal

Serve this hearty tray bake as is, or pair with a simple side of brown rice or crusty bread to soak up the extra honey garlic juices. Garnish with chopped fresh parsley or a scatter of red pepper flakes for a pop of color and gentle heat. This one-pan wonder is just as good for lunch the next day—reheat in the oven or enjoy cold as a salad bowl base.

Nutritional Information and Serving Size

This recipe yields approximately 4 generous servings. Each portion contains an estimated 400–500 calories (depending on sausage type and additional olive oil), making it a balanced meal full of protein, fiber, and vitamins. It’s a healthy, hearty option both for family meals and meal prep.

Ingredients

1 pound smoked sausage or chicken sausage, sliced into 1/2-inch pieces
2 medium sweet potatoes, peeled and cubed
1 large head of broccoli, cut into florets
3 tablespoons olive oil
1/4 cup honey
3–4 cloves garlic, minced
1 tablespoon Dijon mustard
1 teaspoon salt
1/2 teaspoon black pepper
Optional: Fresh parsley for garnish, red pepper flakes for spice

💡 Meal Planning Tip: Save this recipe to instantly generate an organized shopping list—ingredients grouped by grocery aisle for fast, fuss-free shopping and meal prep.

CookifyAI meal planning interface

Instructions

  1. Preheat your oven to 425°F (220°C). Line a large sheet pan with parchment for easy cleanup.
  2. In a small bowl, whisk together the olive oil, honey, minced garlic, Dijon mustard, salt, and black pepper until smooth.
  3. Toss the cubed sweet potatoes with half the honey garlic glaze in a large bowl. Spread them out in a single layer on the prepared sheet pan. Roast for 15 minutes.
  4. Remove the pan from the oven, push the sweet potatoes to one side, and add the sliced sausage and broccoli florets to the pan. Drizzle with the remaining glaze and toss everything gently.
  5. Return the pan to the oven and roast for 20–25 minutes, stirring halfway, until the sweet potatoes are tender and the broccoli is caramelized on the edges.
  6. Remove from oven. Garnish with fresh parsley or red pepper flakes, if desired. Serve hot and enjoy!

Weekly Meal Planning

This recipe is ideal for meal prepping and planning ahead. Save and schedule this recipe to your CookifyAI meal plans and enjoy smart shopping lists that combine and organize all your ingredients by section for every recipe on your plan.

**Planning Benefits:**

– Automatically calculates total ingredient quantities for all scheduled meals
– Groups shopping lists by grocery section for quicker trips
– Prevents forgetting ingredients and duplicate purchases
– Makes weekly meal prep stress-free and efficient

**Pro tip:** Schedule multiple recipes in CookifyAI and see overlapping ingredients—so if you need broccoli for this meal and another dish, your list will tally the total amount needed, helping you reduce food waste and simplify your shopping.

Cook and Prep Times

Prep Time: 15 minutes
Cook Time: 40 minutes
Total Time: 55 minutes

Golden Chicken Stuffing Bake: The Ultimate Hearty Comfort Casserole

Chicken Stuffing Bake

Introduction

Chicken Stuffing Bake is the ultimate comfort food—a bubbly, golden casserole that delivers the savory goodness of chicken, vegetables, and stuffing in every forkful. This crowd-pleasing dish is mouthwateringly flavorful, comes together with minimal prep, and makes family dinners simple yet memorable. If you want a hearty meal that satisfies everyone at the table, this bake is the answer.

Why This Chicken Stuffing Bake Shines

What makes Chicken Stuffing Bake so irresistible? It layers juicy chicken with a creamy, flavorful sauce, then tops it all with a perfectly browned, buttery stuffing crust. Each bite hits all the right notes: tender meat, savory seasonings, and satisfying crunch. It’s versatile enough for weeknights and special occasions alike, and works beautifully as leftovers.

Making the Creamy Chicken Filling

The creamy base of this bake features cooked chicken, condensed soup (like cream of chicken), and a mix of vegetables such as peas, corn, or green beans. This filling is both hearty and comforting, binding the flavors together. For extra flavor, a dash of poultry seasoning or a spoonful of sour cream can be added to the mixture.

Building and Baking Your Chicken Stuffing Casserole

Assembling this casserole is incredibly easy. Spread your creamy chicken mixture in a baking dish, then layer on the prepared stuffing. The stuffing mixture gets crispy in the oven, forming a delicious, golden topping. Bake until hot and bubbling, with the stuffing a deep golden brown.

Serving Suggestions for an Unbeatable Chicken Stuffing Bake

Serve your Chicken Stuffing Bake with a crisp green salad or roasted vegetables for a balanced meal. It’s also delicious alongside cranberry sauce or a light fruit salad to add a touch of sweetness. Leftovers reheat well—making it a great candidate for next-day lunches.

Nutritional Information and Serving Size

This recipe typically yields 6 servings, with about 375–425 calories per serving depending on the type of soup and stuffing used. For lighter options, opt for reduced sodium or low-fat varieties of soup and stuffing.

Chicken Stuffing Bake (Recap)

This Chicken Stuffing Bake brings everything you want in a dinner casserole: creamy texture, bold flavor, and easy assembly. It’s the perfect solution for busy weeknights, potlucks, or feeding a hungry family with minimal fuss.

Ingredients

3 cups cooked chicken, shredded or cubed
1 box (6 oz) stuffing mix (chicken or herb flavor)
1 can (10.5 oz) condensed cream of chicken soup
1/3 cup sour cream
2 cups frozen mixed vegetables (peas, corn, carrots, or green beans)
1 cup chicken broth (or as directed for stuffing)
3 tablespoons melted butter
1/2 teaspoon garlic powder
1/2 teaspoon onion powder
1/4 teaspoon black pepper
Fresh parsley or dried herbs for garnish (optional)

💡Meal Planning Tip: Save this recipe to automatically generate an organized shopping list with all ingredients sorted by store section—perfect for efficient grocery trips and meal planning.

CookifyAI meal planning interface

Instructions

  1. Preheat your oven to 375°F (190°C). Lightly grease a 9×13-inch baking dish.
  2. Prepare the stuffing mix following box instructions, using chicken broth instead of water for richer flavor. Set aside.
  3. In a large bowl, combine cooked chicken, condensed soup, sour cream, frozen vegetables, garlic powder, onion powder, and black pepper. Mix until evenly coated.
  4. Spread the creamy chicken mixture evenly in the prepared baking dish.
  5. Fluff cooked stuffing with a fork, mix in melted butter, then evenly distribute the stuffing mixture over the chicken layer.
  6. Bake uncovered for 30–35 minutes, or until the casserole is bubbly and the stuffing is golden brown.
  7. Let cool for 5 minutes before serving. Garnish with parsley or herbs if desired.

Weekly Meal Planning

This Chicken Stuffing Bake is a meal planning lifesaver. Save and schedule this recipe to plan your week, and CookifyAI will automatically organize your shopping list, total ingredient quantities, and group items by grocery store section.

Benefits of Planning with CookifyAI:

  • Automatically adjusts ingredient amounts based on your planned servings across all recipes
  • Organizes shopping lists for efficient store visits
  • Eliminates duplicate purchases and forgotten items
  • Makes weekly meal prep streamlined and stress-free

Pro tip: When you plan several meals at once, schedule your recipes to see overlapping ingredients and reduce food waste—CookifyAI keeps everything sorted and simple.

Cook and Prep Times

Prep Time: 15 minutes
Cook Time: 35 minutes
Total Time: 50 minutes

Enjoy this Chicken Stuffing Bake for its flavor, ease—and the meal planning simplicity it brings to your week!

Easy Apple Dump Cake: A 5-Ingredient, 10-Minute Miracle Dessert

Easy Apple Dump Cake (5 Ingredients, 10-Min Prep!)

Introduction

Craving a warm, comforting dessert that practically makes itself? This Easy Apple Dump Cake (5 Ingredients, 10-Min Prep!) is your answer. Juicy apples, a buttery cake topping, and a hint of spice come together for a crowd-pleasing dessert that looks and tastes homemade—with minimal effort. Perfect for busy weeknights, potlucks, or a last-minute sweet treat, this dump cake is proof that delicious doesn’t have to be complicated.

Why Easy Apple Dump Cake Is a Must-Make

This apple dump cake stands out for its sheer simplicity—just layer, bake, and enjoy! With only five pantry-friendly ingredients and about 10 minutes of hands-on prep, you get all the comforting flavors of a traditional apple crisp or cobbler, but with less time and fuss. It’s ideal for those who want maximum flavor with minimal cleanup.

Choosing Ingredients for the Best Dump Cake

High-quality apple pie filling delivers sweetness and spice, while a box of yellow cake mix creates a golden, buttery crust. Don’t skip the melted butter—it’s key for a crispy topping. If you like extra flavor, sprinkle on some ground cinnamon. For a nutty crunch, toss in your favorite chopped nuts like pecans or walnuts. This flexible recipe offers room for creativity without adding complexity.

How to Layer and Bake Your Dump Cake

Start by spreading the apple pie filling evenly in your baking dish. Next, sprinkle the dry cake mix over the apples (don’t mix!), so you get pockets of crispy, cake-like topping. Drizzle melted butter and optional cinnamon over everything, then scatter nuts if using. The result? A perfectly golden, gooey, and crisp-topped dessert that’s ready with barely any work.

Serving Suggestions for Your Easy Apple Dump Cake

Serve this warm apple dump cake straight from the oven with a big scoop of vanilla ice cream or dollop of whipped cream. For a touch of elegance, add a drizzle of caramel sauce and a sprinkle of cinnamon or nutmeg. This fuss-free dessert is guaranteed to be the star of any meal or get-together!

Nutritional Information and Serving Size

This recipe yields about 8 generous servings. Each portion contains roughly 350 calories, depending on the specific brand of cake mix and amount of butter or nuts used. It’s a sweet, comforting treat best enjoyed in moderation.

Easy Apple Dump Cake (Recap)

With just five ingredients and 10 minutes of prep, this apple dump cake offers cozy, classic flavors and crowd-pleasing appeal. It’s the ultimate “set-it-and-forget-it” dessert—simple enough for beginners, but tasty enough that everyone will want seconds.

Ingredients

2 (21-ounce) cans apple pie filling
1 box yellow cake mix (about 15.25 ounces)
1/2 cup (1 stick) unsalted butter, melted
1 teaspoon ground cinnamon (optional)
1/2 cup chopped pecans or walnuts (optional)

💡Meal Planning Tip: Save this recipe to automatically generate an organized shopping list with all ingredients sorted by store section. Make shopping simpler and ensure you never forget a key ingredient!

CookifyAI meal planning interface

Instructions

  1. Preheat your oven to 350°F (175°C). Lightly grease a 9×13-inch baking dish with nonstick spray or butter.
  2. Spread both cans of apple pie filling evenly across the bottom of the dish.
  3. If using, sprinkle ground cinnamon evenly over the apple filling.
  4. Sprinkle the dry cake mix evenly over the apples—do not mix.
  5. Drizzle melted butter evenly over the entire surface. Make sure to cover as much of the cake mix as possible for the best texture.
  6. Top with chopped nuts if desired.
  7. Bake for 40–45 minutes or until the top is golden brown and the filling is bubbly around the edges.
  8. Let cool for at least 10 minutes before serving. Enjoy warm with your favorite ice cream or whipped topping!

Weekly Meal Planning

This easy apple dump cake is not only a weeknight lifesaver, but it’s also a fantastic addition to your meal plan rotation. Save and schedule this recipe with CookifyAI to create coordinated shopping lists for the whole week and streamline your prep.

Planning Benefits:

  • Automatically adds up ingredient quantities if you’re making multiple desserts or meals.
  • Sorts your shopping list by grocery section for efficient trips.
  • Eliminates duplicate purchases and forgotten items.
  • Makes meal prep and grocery planning quick and organized.

Pro tip: When you schedule apple dump cake and other recipes for the week, CookifyAI instantly calculates total apples, butter, or other shared ingredients you’ll need. No more guessing or waste—just smarter meal planning.

Cook and Prep Times

Prep Time: 10 minutes
Cook Time: 40–45 minutes
Total Time: 50–55 minutes